

Why Did I Switch to a Smarter Hopper Loader for Cleaner, Leaner Production?
2025-11-13
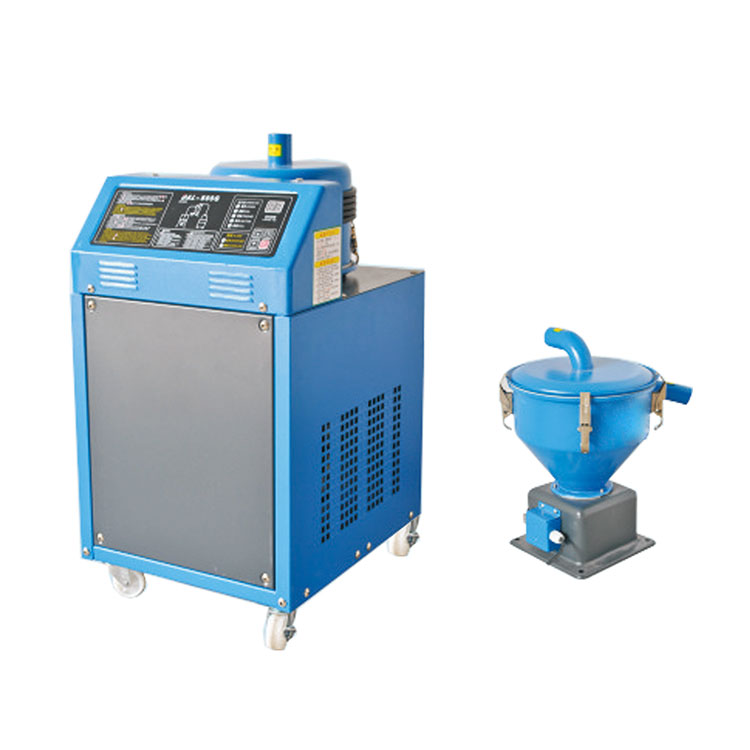
When our lines kept stopping for material shortages and dust cleanup, I knew the fix was not more manpower but better feeding. That is when I started testing a Hopper Loader from Niasi. I brought it onto one molding cell, watched the data, and then rolled it out across the floor because the results were steady, not flashy. Below is the way I think about the choice, the setup, and the payback so you can decide faster and avoid my early mistakes.
What problems did the Hopper Loader actually remove?
- Material starvation vanished because the receiver stayed topped up with a responsive level sensor that did not drift during long shifts.
- Housekeeping dropped because the sealed path and stronger dust filtration kept fines out of the air and off the hoppers.
- Line changeovers got quicker because clamp-type couplings and quick-release screens cut reconfiguration time.
- Operators stopped babysitting loaders because alarms became precise, and the centralized feeding system dashboard showed which station needed attention.
- Bridging in the throat declined after I added a short agitator sleeve and tuned vacuum pulses for stable plastic pellet conveying.
How did I size capacity and power without guesswork?
I stopped chasing oversized blowers and used a simple approach. I measured average part weight and cycle time, translated that into hourly resin demand, then added a buffer for regrind swings. From there I matched blower power to required vacuum at my real conveying distance including bends and height. This kept noise down and energy use honest.
| Throughput target kg per hour | Typical conveying distance m | Recommended motor kW | Receiver volume L | Best use case | Notes |
|---|---|---|---|---|---|
| 60–120 | 5–15 | 0.75–1.1 | 6–12 | Single press or dryer | Short runs and frequent color changes |
| 120–250 | 15–35 | 1.5–2.2 | 12–18 | Two presses sharing one source | Use wear-resistant elbows for glass-filled grades |
| 250–450 | 35–60 | 3.0–4.0 | 18–25 | Cell with dryers and blenders | Check vacuum at farthest drop before committing |
Which features made my daily work calmer?
- A sealed stainless steel hopper that does not flex or shed paint during hot runs
- A brushless turbine that behaves like a vacuum loader but with quieter startup and fewer carbon dust issues
- Cartridge dust filtration you can pull without tools and clean without tearing the gasket
- Smart refill logic on the auto loader that stops short cycling when the mold speeds up
- Real-time counters that track rejects tied to low material events, so I could show true material handling efficiency gains
How did I install and commission with fewer surprises?
- I mapped the route with a minimum of 90-degree bends, since each elbow adds hidden meters to effective conveying distance.
- I kept vertical rises near the source, not at the machine, to reduce pellet scuffing and angel hair.
- I sealed every joint and avoided tape patches because any leak robs a vacuum loader of lift exactly when you need it most.
- I grounded the piping to silence static and protect sensors during dry winter runs.
- I ran a 24-hour soak test and logged alarms, then adjusted refill timing and purge to match the dryer’s outflow.
What maintenance rhythm kept performance steady?
- Daily: empty the sight glass, check the level sensor, and verify hopper lid seals by a quick vacuum hold test
- Weekly: clean the primary dust filtration cartridge and inspect the check valve for backflow fines
- Monthly: review hoses for soft spots near hot zones and replace worn elbows before they pinhole
- Quarterly: validate airflow with a pitot reading and recalc loader timing if you changed resin bulk density
Where did the savings show up on my sheet?
Unplanned stops fell after alarms became actionable. Labor hours moved to higher value tasks. Energy trended down once we right-sized the blower and shortened the route. In short, the material handling efficiency gains were visible in both OEE and floor morale.
Why did I keep the Niasi units after the pilot?
Support answered with wiring diagrams fast, spares arrived on time, and the controls spoke cleanly with my blender and dryer. The intake screens handled regrind without fuss, and the lids stayed tight after repeated heat cycles. When I needed a custom receiver for a tight press guard, the team built one that fit without cutting sheet metal.
What questions should you ask before you buy?
- Can the Hopper Loader logic sync with your dryer and blender so you avoid fighting setpoints
- What is the verified capacity at your real conveying distance and elevation, not the lab bench value
- How fast can you get a replacement turbine and filter kit during peak season
- Does the centralized feeding system show per-station alarms with plain language, not cryptic codes
- Is the receiver a true stainless steel hopper with food-contact finishes if you run medical or packaging
Can I see a quick spec snapshot that matches most shops?
If your press count is under ten and your longest run is below 40 meters, a midrange auto loader with a 1.5–2.2 kW turbine, 12–18 L receiver, and high-area dust filtration will usually carry you through. Add inline magnets if you see screws in gaylords, and keep one spare hose for night shifts.
Ready to move material smarter with Niasi?
If you want a grounded plan for plastic pellet conveying that starts delivering in weeks, tell me about your line speeds, current alarms, and the longest hose run. I will respond with a clear layout and a right-sized vacuum loader setup. Leave an inquiry or contact us today so we can map your route, size the Hopper Loader, and schedule a clean install without slowing production.